
USB uses a client-server architecture, where the "host" acts as the server and the "device" as the client. In this project, the teensy board will act as both a USB host and a USB device, with two connections. There is the connection between the teensy and the controller, where the teensy is the host, and the controller is the device. There is also the connection between the teensy and the PC, where the teensy is the device, and the PC is the host.
Hacking the original xbox controller for fun and no profit
- 28th April 2023TLDR: I made a hardware adapter which lets you use an original xbox controller to play PC games. Code and instructions available here.
I always liked the original xbox controller. The big beefy one that they originally shipped with, not the smaller one they switched to later.
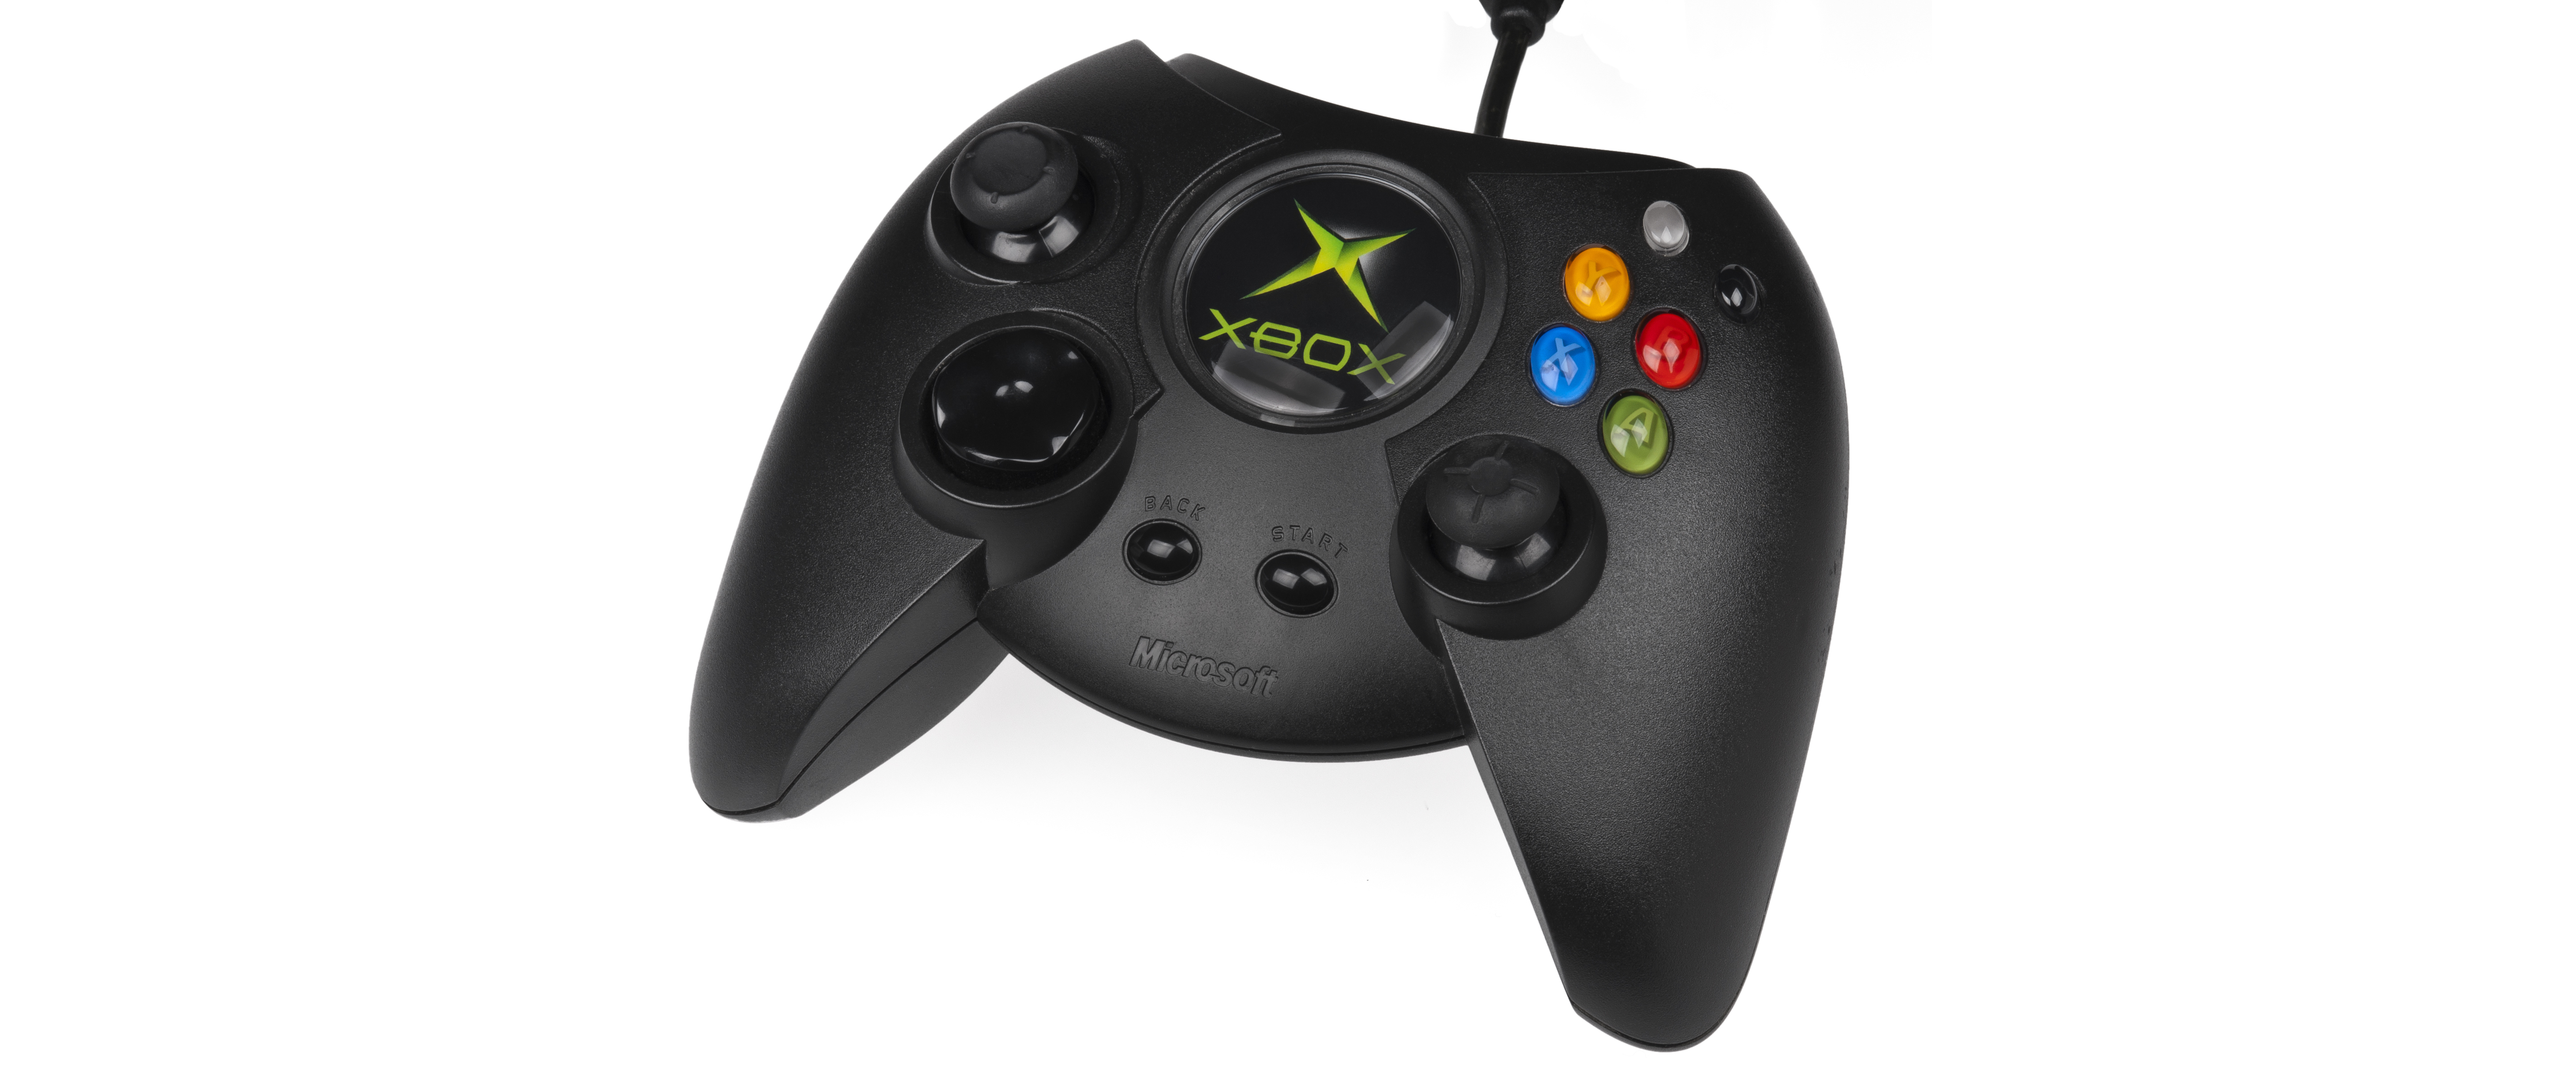
The controller was oversized and was not very well received ... it was awarded "Blunder of the Year" ... ranked the second worst video game controller ever
- Wikipedia
I DON'T CARE, I LIKE IT
I've been using controllers to play PC games a lot recently (partly because of problems with RSI, and partly just because some games are better that way). So long story short, I wanted to use it to play PC games, but there's a problem:
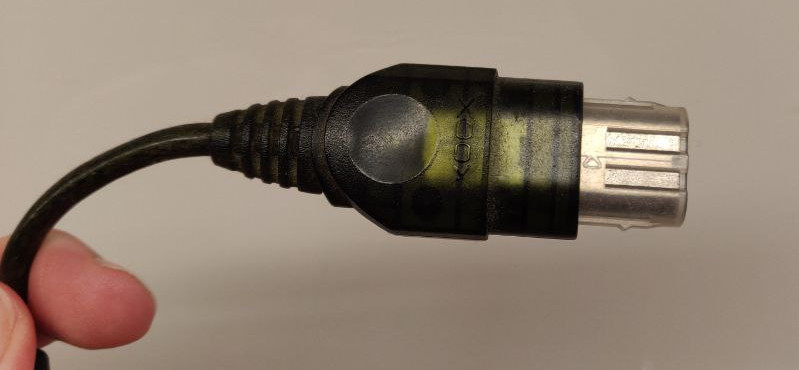
That doesn't look like a USB cable...
But plot twist: actually it is! Underneath the fancy proprietary connector, the original xbox controller is actually using USB. So I can just bodge together a hacked cable to convert it to a standard USB A connector and we're done then? Well, not quite. As you might have guessed, the protocol the controller uses to communicate over USB is completely proprietary, so if I want to use it to play games, I'm gonna need drivers. The thought came to me that I should make a hardware adapter instead, that converts it to present itself as something widely supported, that way I don't need special drivers. I chose to have it present itself as though it were an xbox 360 controller, because they work pretty much everywhere.
But why make a hardware adapter instead of a driver (especially when an open source driver already exists)? I mean, I could try to bullshit you by saying I did it this way because of it being a more robust solution, because it doesn't rely on sketchy third party drivers, or that it will work with OSes other than windows more smoothly, but honestly they would all just be post-hoc justifications. This way is more fun, that's all the reason I need. I also wanted an excuse to buy a soldering iron.
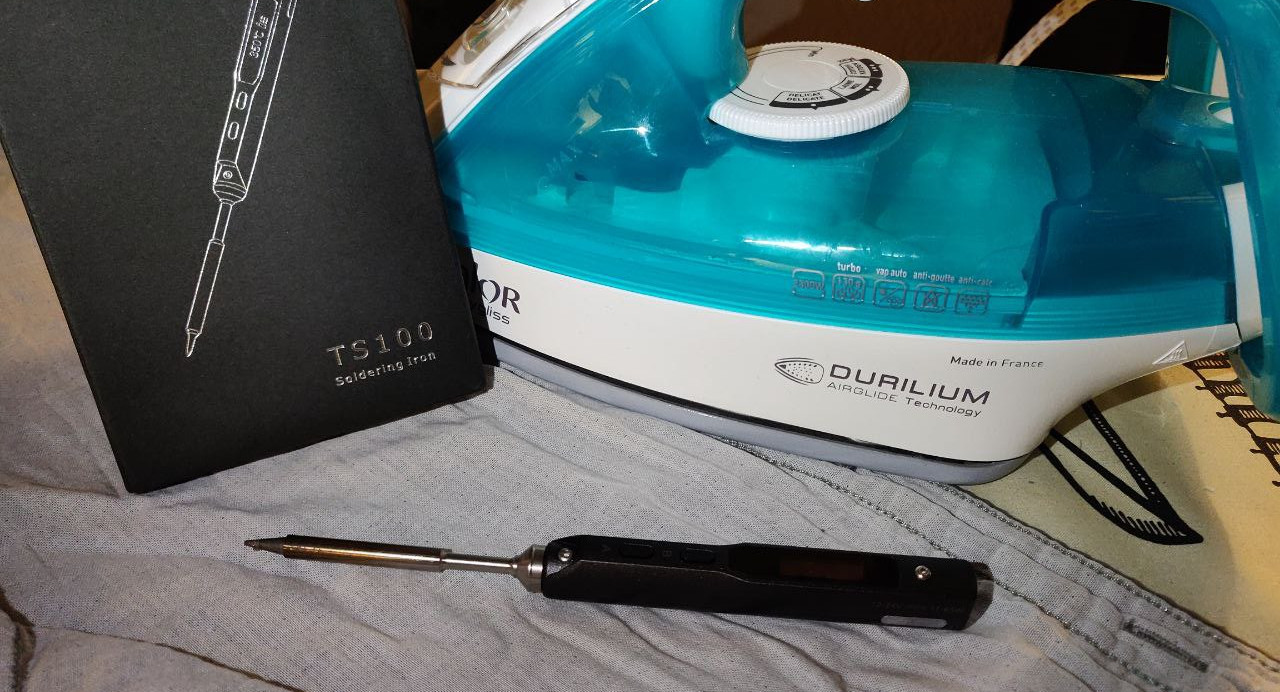
The iron in question. I wanted a small one.
Ok, so what do I need?
- An original xbox controller
- Some microcontroller board to do the conversion, that has two USB interfaces (one to connect to the PC, one to connect to the controller). I settled on a teensy 4.1
- A sacrifical cable that I can cut and solder to the teensy - ebay provides
- Some kind of case to keep it safe - I used a simple boxy 3D print
- Skills vaguely approximating those required to solder electronics
I started off by cutting the ebay cable and soldering it to the teensy[1], then hacking around with the teensy USB host library.
What does USB host mean?
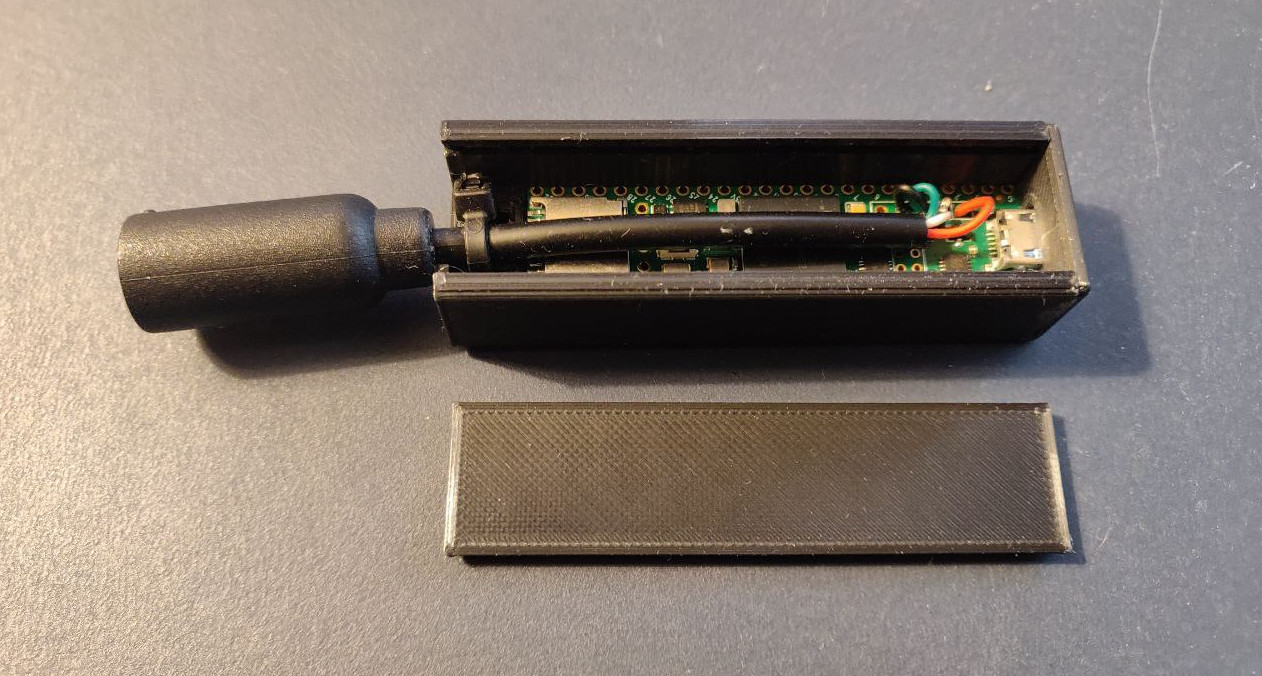
Teensy in box, all soldered up
Pretty soon, I had the teensy set up to log to my PC, and I could see in the logs that it was detecting a device attached to it. A usb hub. With a vendor id of 0x45e - which is Microsoft. Wat. I was initially confused, but eventually figured out how to see devices attached to the hub as well, and there was an extra device, with product id 0x202 - bingo. It's the controller. I'm not 100% sure, but I think the controller probably has an internal USB hub because it also has slots for memory cards on the controller. I'm guessing if I had a memory card plugged in there, it would show up as another device on the hub. I couldn't test as I never had a memory card, the internal hard drive was plenty[2].
Can you tell I was excited?
So the next step was to write a custom host driver for the xbox controller. You might be expecting it to be a relatively standard USB HID device, but it's not. It's a custom, but relatively simple protocol. The part which took the most time here was just figuring out how to make a custom device driver at all. At some point I noticed that I was flipping between the USB 2.0 spec and the EHCI spec PDFs while listening to the SHENZHEN I/O OST, and if you've played SHENZHEN I/O, you'll know that's pretty on brand. In the end, what I got was regular dumps of 20-byte payloads. Something like this:
00 14 00 00 00 00 00 00 00 00 00 00 F4 F0 00 00 96 1B 76 F3
It should be relatively easy to reverse engineer the different fields by pressing various buttons and looking at the bit patterns, but luckily I could use an existing driver as a reference so I didn't have to. What we get is some bitfields for the digital buttons, two int16s for each thumbstick (one for x, one for y), two uint8ts for the trigger, and six uint8s for the six analog buttons. Wait... analog buttons? Yep, turns out the original xbox controller has a hardware feature not seen since the PS3 era - the A, B, X, Y, white, and black buttons have 256 pressure levels.
Example here using a PS2 controller, but you get the idea
There's a reason you probably don't remember this feature - and it's the same reason it doesn't exist today - few games used it. And of those which did, most didn't really need it. Anyway, our goal here is to emulate a 360 controller which does not have this feature, so sadly we'll just be thresholding the analog buttons into binary states. If you want to have a looksee, the xbox controller driver is here.
Ok, so how do we emulate an Xbox 360 controller? 360 controllers use a system called XInput. It's a microsoft API that presents you with buttons matching those found on a 360 controller, and it supports four controllers at a time. Basically it's the input system of the xbox 360, but also available on PC, and it's what most games have used for gamepad support for the last decade or so. Handily, there is an open source library that implements firmware to emulate an XInput device. Unhandily, it doesn't support the teensy 4 series of development boards. So, there was a brief[3] interlude while I ported the teensy 3 patches to support the teensy 4.
The upstream ArduinoXInput_Teensy project is implemented as a patchset on top of the teensyduino SDK, which is a bunch of extra code and tools which you install on top of the Arduino IDE to add support for teensy boards. The teensy 3 and 4 series boards are based on totally different processors, and so they have totally separate firmware source folders. There was clearly some copy-pasta from 3->4, but the low level details are different, and that's what we need to mess with because the firmware is not designed to be "extensible" from user code in the form of changing how the USB device port acts. There is a fixed set of USB device types implemented, and the user just chooses one from a menu in the Arduino IDE. We need to get in there and add a new one.
One small detail that makes this all a lot more painful than it had to be: the debug log interface operates over the USB device port. This means while we're in there messing around with the usb stack, we have no debug log, so tracking down issues becomes hellishly difficult. I did have a single onboard LED that I could use to dump one bit of state directly into my eyeballs, so that was nice I guess. I seriously considered soldering on a few more wires to some free GPIO pins and getting a serial interface going that way, but in the end I managed to avoid shaving that yak.
Initial porting went pretty well, and I got the code mostly set up, added in the descriptors, and resolved a weird issue with max packet size[4].
What are USB descriptors?
Descriptors are little chunks of data that describe how a USB device operates. The standard descriptors we're interested in include:
- The device descriptor, which describes basic information about the device, such as the name, vendor id, and product id.
- The configuration descriptor, which holds the device's interface descriptors.
- The interface descriptors, which describe the various capabilities of the device. If my understanding is correct, this is the kind of thing a driver would bind to, and a multipurpose device would have multiple interfaces. For example, a webcam might have an interface for the built-in microphone, and another interface for video. Each interface contains endpoints.
- The endpoint descriptors, which describe the communication channels in the interface. An interface can have multiple endpoints. Each one has a direction (host->device vs device->host), a type, and defines a "pipe" that the device can communicate with the host through.
The above is simplified somewhat, and omits some details, but it should get across the basic idea.

Artist's rendition of my mental state
Then I got stuck for a long time. In case it wasn't clear: I am outside my comfort zone here. I don't normally work with hardware or embedded development, so it took me a while to figure out the problem. The problem was that the Xbox 360 controller uses endpoint 1 for sending input reports, but I couldn't get endpoint 1 working. Normally this wouldn't be a big issue, I could just use some other endpoint, but since I'm trying to emulate an exising device here I don't really have that option. I found some code that was silently failing if you tried to use endpoint 1 and commented it out but it still didn't work. After grinding at this for a long time and reading a lot of source code and chunks of the IMXRT1060 manual, I eventually thought to search github issues on the teensyduino repo for "endpoint 1", and thanks to the BASED GOD phdussud I realised I was just missing one line to configure endpoint 1 before trying to use it. This is one of those things that's so obvious in hindsight that you curse your past self. Turns out they were just reserving it for some planned feature that will use endpoint 1. Well, whatever that feature is, I don't need it so I can safely reenable endpoint 1, and just never update[5].
I had been using wireshark to spy on USB packets this whole time (and wondering why I wasn't seeing any). After applying the endpoint 1 fix, I started to see what looked suspiciously like valid packets in wireshark, alt-tabbed over to gamepad-tester.com, and hot diggity damn, it was working. From this point on it was pretty smooth sailing, and I was able to get rumble working pretty easily (for this I needed to accept packets from the host on a separate endpoint).
Playing Halo 3 with the duke controller on a pc feels kinda wrong in all the right ways
Please excuse the breathing noises, I was holding my phone in my mouth with a piece of cardboard. Only the best for my esteemed readers. There was a small bug with rumble which you can see at the end of that video (sending rumble packets too fast makes the controller shut down somehow), but after that everything works! I was able to play through the first three halo games with it, so I would call that working. The one remaining (super weird) issue is that if it's plugged into my PC at boot time it takes a long time to boot, if anyone knows why that is please let me know!
PS: I am a good boy, so I did upstream my patches. In case you were worried.
1: I had never really done much soldering before, and initially I couldn't figure out why absolutely nothing was working. I mean, I'm attaching four wires to four metal holes here, this should be about as easy as it gets. I was using some random cheapo solder, and it just would not stick to anything. After a great deal of frustration, I finally bought some leaded solder, and it was ridiculously easy. It finally just worked like the youtube videos. Beatiful toxic heavy metals win the day.
2: I mean, I also had my original xbox, controller, and games stolen *checks watch* about 18 years ago, so it's not like I'm working with my authentic childhood hardware here anyway.
3: lololol not brief at all. This took me ages to figure out.
4: USB enumeration fails if maxpacketsize is set to 8? (8 is what a real 360 controller uses, and what the teensy 3 code was using). Dunno lol, it works if I leave it at 64.
5: This is one of the reasons why I stashed a copy of the exact version of Arduino IDE and teensyduino that I started from in my git repo. The other is that I just like to vendor dependencies where possible anyway.